
Here's one of the walls in its development stage.
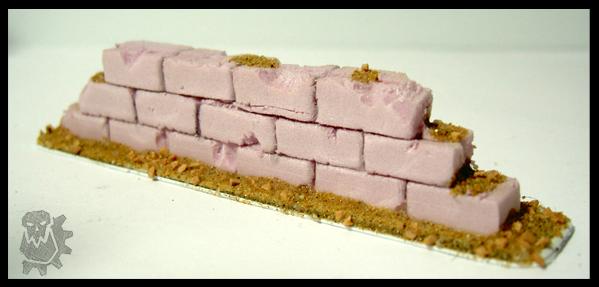
The wall itself was made with pink insulation foam bought at Home Depot. I bought a 2x8' sheet for a little under $9, which is more than I'll need for quite some time, though I wont be using it exclusively for small brick wall. I cut out a 4x1" section of the foam, as to leave room for error.
The foam was fairly thick and the bricks themselves are only a 1/4" thick, so I had to cut it down a bit. This proved to be a bit of a learning process as you need a very sharp knife and one good cut in one direction. Sawing motion can be seen and may mess up the surface.
From there, I lightly marked off 3 1/4" tall rows with a pencil and marked off the ends of the bricks at each centerpoint, doing this for boths sides. After that, I carefully cut into the marks, being sure not to cut too deeps on either side as to not lop off an entire row. After cutting the bricks, I went in with a pencil and opened the grooves up a bit. Once content with them, I chipped and cut away at the bricks at rando (again with care, foam can be quite delicate at this thickness).
Once finished with the wall, I mounted it on a 3/4 x 4" peice of plasticard (I would recommend Masonite as it does not flex, however, I did not have Masonite so I settled with plasticard) Then I based it, putting a bit of dirt on the bricks. Important! Super glue cannot be used on foam, as it will cause it to deteriorate, so I used PVA glue to mount and base it.
Regarding gameplay, this obstacle would provide cover and act as an obstacle from behind the plasticard area, not the bricks themselves. I felt doing a brick wall that was exactly 4 x 3/4" with no damage or distinction would have been terribly boring and well... stupid.
Once letting it fully dry for several hours, I moved onto painting. As aerosol products melt foam, I did not primer the walls.
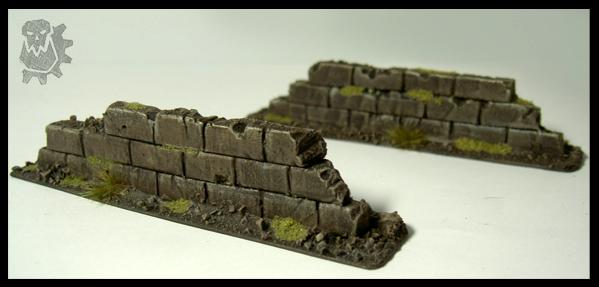
I started out with a base coat of Black. I used Vallejo for this as it is a bit thicker and even with a bit of water it spreads well. (which was needed to get into some of the cracks). After that I applied a drybrushed layer of P3 Battlefield Brown, making sure it was more brown than black. A lighter drybrush layer of GW Snakebite Leather (no idea what its called now) was applied. Then I painted some very very light highlights on the edges using P3 Menoth Base.
As a final touch I put some mossy flock on on the base and some of the crevasses to give that old mossed-touched appearance, as well as a few stick on bushes (with a bit of glue). Again, I did not varnish this due to the aerosol, but if you have varnish paint, you can try using an airbrush if you like.
This is the begging of a series of terrain I will be creating and hope you enjoyed this brief tutorial.
No comments:
Post a Comment