
Thursday, January 19, 2012
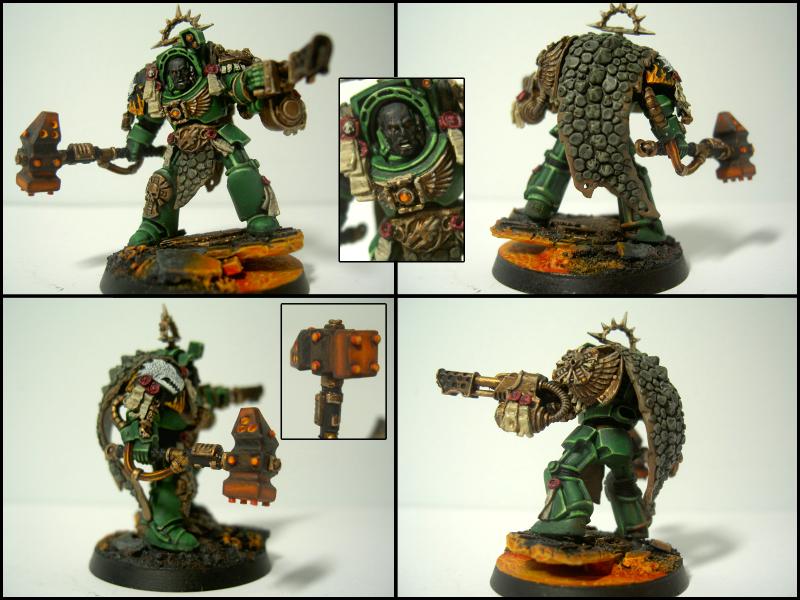
Completed Tu'Shan
I've been to busy shamelessly plugging this mini over on Dakka and forgot to give it some love here!


Wednesday, December 28, 2011
Saturday, December 17, 2011
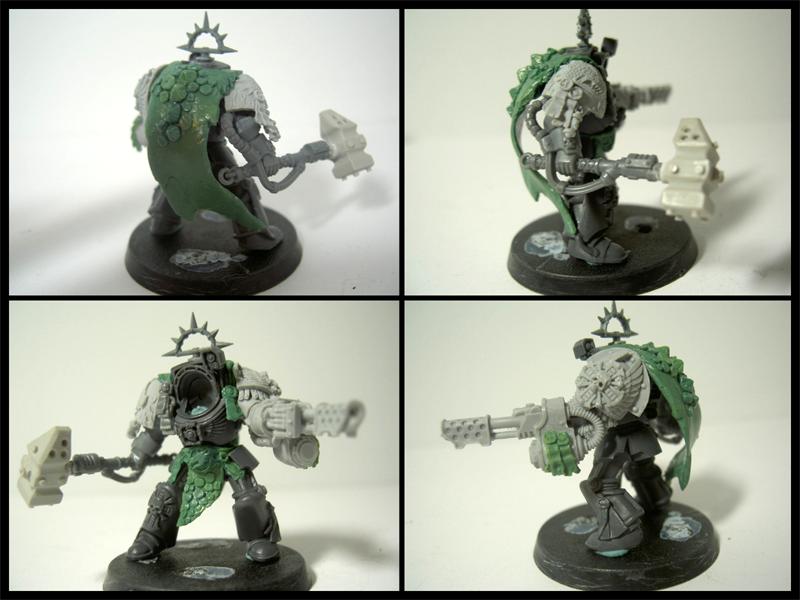
Tu'Shan Revamped!
So after much deliberation, I decided to re-make my Chapter Master Tu'shan model. Although i have a soft spot for it, its quite outdated and old when standing next to my newer stuff. For those unfamiliar with this Salamander character, he's kind of a boss :P, easily displayed in this excerpt:
"In addition, while commanding the Salamanders' veteran 1st Company, the Fire Drakes, Tu'Shan defended one of the last bridges over the River Stygies against a column of 1,000 Ork Speed Freeks, fighting consecutively for 3 days and 4 nights. By the end of the campaign, Tu'Shan was so respected that Lord Commander Dante praised him as the model of what a Space Marine should be in front of the entire assembled Blood Angels Chapter."
Ever since I saw his fluff entry in the Armageddon Codex, Tu'Shan has and still is one of the most BA marines in the Imperium.
Anywho, I started off with a basic sketch up in Photoshop of what I wanted him to look like with the BCW painter, except he would have no helmet. Going with a longer, off-kilter cloak that hangs long on one side, with a somewhat diagonal angle to the bottom. Will be doing all my cloaks and scale ala my normal Greenstuff method for it, piece by tiny piece.
 Started off with the base while I waited on bitz, which ended up taking quite some time to arrive. I had a Sally Rhino door laying around, having used the other 2 on a Vindicator, so I thought it would look cool to have him standing on some wreckage over a lava flow.

Decided on using some FW stuff such as the Salamander shoulder pad (unfortunately there was only one type in stock on the bitz store but I liked it anyways) and the heavy flamer arm from Lugft Huron.
Found some nice hammers from Maxmini and I plan to use the hammer heads. This is the current Blu-Tac'd pose I'm going with. :D With a little Instant mold work, I made a greenstuff belt and chest icon courtesy of Vulkan He'stan's model.

Looking to get him glued up and fully greenstuffed over the course of this weekend!
"In addition, while commanding the Salamanders' veteran 1st Company, the Fire Drakes, Tu'Shan defended one of the last bridges over the River Stygies against a column of 1,000 Ork Speed Freeks, fighting consecutively for 3 days and 4 nights. By the end of the campaign, Tu'Shan was so respected that Lord Commander Dante praised him as the model of what a Space Marine should be in front of the entire assembled Blood Angels Chapter."
Ever since I saw his fluff entry in the Armageddon Codex, Tu'Shan has and still is one of the most BA marines in the Imperium.
Anywho, I started off with a basic sketch up in Photoshop of what I wanted him to look like with the BCW painter, except he would have no helmet. Going with a longer, off-kilter cloak that hangs long on one side, with a somewhat diagonal angle to the bottom. Will be doing all my cloaks and scale ala my normal Greenstuff method for it, piece by tiny piece.

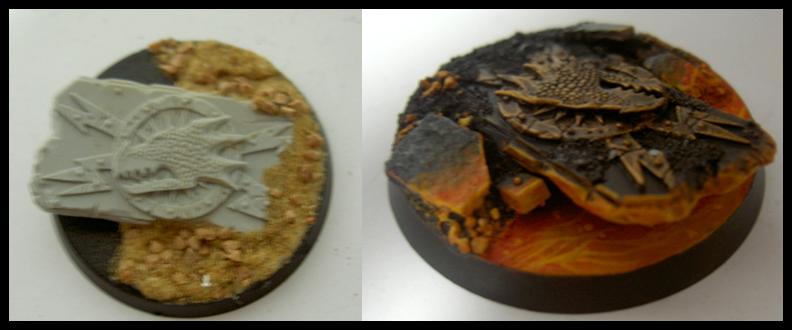
Decided on using some FW stuff such as the Salamander shoulder pad (unfortunately there was only one type in stock on the bitz store but I liked it anyways) and the heavy flamer arm from Lugft Huron.
Found some nice hammers from Maxmini and I plan to use the hammer heads. This is the current Blu-Tac'd pose I'm going with. :D With a little Instant mold work, I made a greenstuff belt and chest icon courtesy of Vulkan He'stan's model.
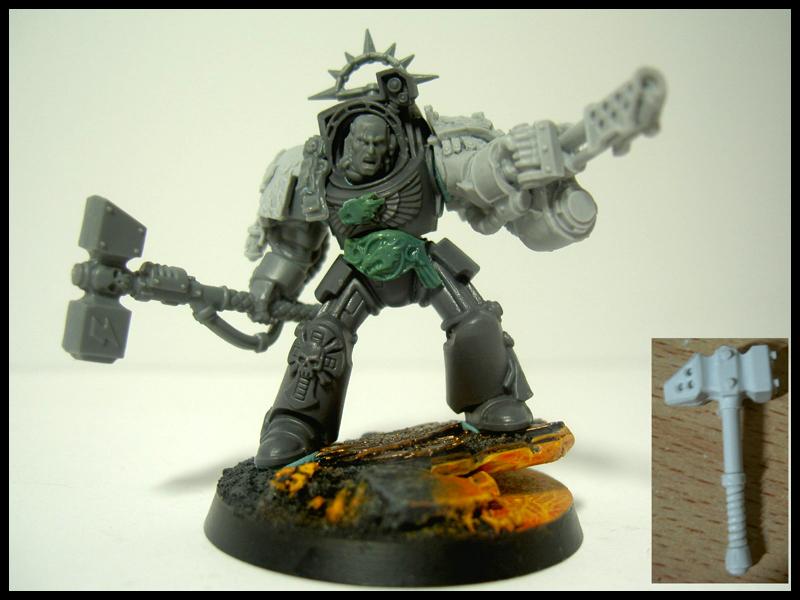
Looking to get him glued up and fully greenstuffed over the course of this weekend!
Thursday, November 10, 2011
Bull Snapper and Swamp Pit
A few additions to Barnabas' crew!
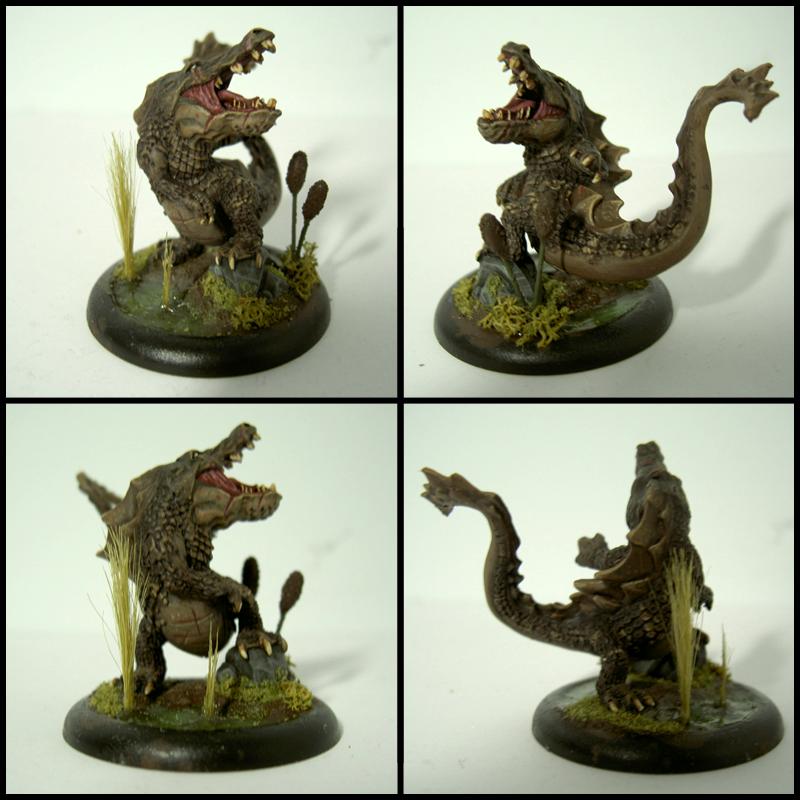
A Bull Snapper. Pretty happy with the result on this one. Had to do a decent amount of greenstuff work to get rid of some of the part edges. Sculpted a wee bit around the eye for the gash. Did a subtle striped pattern for the body, which I plan to do for the rest of my gators as I build them up, as well as the swamp bases for each model.

Also created a Swamp Pit Marker for Barnabas' Swamp Pit spell as well as the tier/pact swamp zone bonuses.

This one was pretty fun to make, as I don't often do much terrain work. After cleaning up my desk, I found a lid to a Pringles can. Wondered if it could work as a terrain base and turn out it was 3" diameter, which worked out great! After watching a vid, I went through with it make it with DryDex Spackle, some sand, and some water effects. Tossed some fine grade flock into the water effects to give it a light algae look. The Pringles lid is a bit soft and isnt exactly flat, but it was a good first experiment. Actually nice since it has a slight curve to it where it allows a little bit underneath it and still lays flat.
Followed this tutorial series to make it, make a few substitutes for what I had on hand.
http://www.youtube.com/watch?v=pzA9UIe7dHg
A Bull Snapper. Pretty happy with the result on this one. Had to do a decent amount of greenstuff work to get rid of some of the part edges. Sculpted a wee bit around the eye for the gash. Did a subtle striped pattern for the body, which I plan to do for the rest of my gators as I build them up, as well as the swamp bases for each model.
Also created a Swamp Pit Marker for Barnabas' Swamp Pit spell as well as the tier/pact swamp zone bonuses.
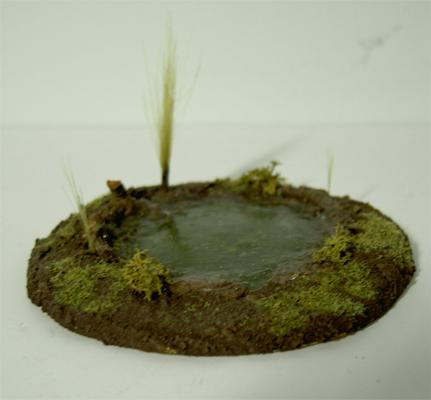
This one was pretty fun to make, as I don't often do much terrain work. After cleaning up my desk, I found a lid to a Pringles can. Wondered if it could work as a terrain base and turn out it was 3" diameter, which worked out great! After watching a vid, I went through with it make it with DryDex Spackle, some sand, and some water effects. Tossed some fine grade flock into the water effects to give it a light algae look. The Pringles lid is a bit soft and isnt exactly flat, but it was a good first experiment. Actually nice since it has a slight curve to it where it allows a little bit underneath it and still lays flat.
Followed this tutorial series to make it, make a few substitutes for what I had on hand.
http://www.youtube.com/watch?v=pzA9UIe7dHg
Saturday, November 5, 2011
All them teeth and no toothbrush...

My completed Bloody Barnabas.Very pleased with the swamp basing on this. My first actual detailed, multi-texture base, as I usually stick to plain basalt and gravel. Decided to go with a darker, muted color pallet, painting Barnabas with more of an American Alligator skin.
The base was done with a little bit of Spackle (Drydex brand, pink to white dry indication is fantastic), sand from the side of my pool, field grass and a bit of fine green flock. The branches are twigs I pulled from the backyard. Unfortunately I bought Water Effects (a thicker more moldable gel, instead of the regular water stuff, but it worked well enough. A bit of greenstuff on a pin and theres a few cattails.
Also building 3" swamp markers, using the same method. It'll be nice to have a good visual when I do Swamp Pit and toss around all the shallow water!
Tuesday, November 1, 2011
Back into the fray.
Just recently decided to hop into my FLGS's Friday 40k league nights, and am very happy with doing so. Although I'm not entirely content with the current edition, it was enjoyable playing a new opponent for what has seemed like ages (actually probably over 6 years since I've played a pickup game with a stranger).
Decided to bring my Salamanders to the table since I'm most comfortable in power armor. No love for the Orks this week, but maybe I'll throw down with them later on. My opponent was a Tau force and we played a short 770pt game. We rolled for the mission and it was a King of the Hill with Night Fight on the first turn. Although the player was new, he was a quick learner and it was nice for me since I had forgotten many rules myself.
I managed to nuke myself on my first turn by having my Librarian use Gate of Eternity and scatter a whole squad into difficult terrain, killing 5 of them, 2 of which were special weapons. In the subsequent turn, the rest of the squad was shot to death by Fire Warriors, leaving the Librarian alone. Fortunately enough, his Terminator Armor proved worthwhile and he survived without a scratch.
As I marched my other two tactical squads up to the objective, the Librarian assaulted the nearby Fire Warriors squad and tying them up for the remainder of the game. Slight opposition was met when the Tau Commander jumped in, by after a few whiffs with my Force Weapon, I finally killed him, passing my psychic test and killing him outright. The Librarian continued to tie up the fire warriors while the tactical squads controlled the objective. A bit shot up by the ended of the game, which was cut short at turn 5 due to the store closing, but they still got the job done.
Definitely looking forward to this weeks games. Eye'd up some of the other players while I waited around, gauging what I may need to take for the future.Overall I'm enjoying the points system. Start off with only Troops and HQ available and as you progress, Elites, Fast Attack and Heavy Support open up, as well as special characters. And a few more games and Vulkan He'Stan will be joining the force. Then I'll be bringing some hurt.
Decided to bring my Salamanders to the table since I'm most comfortable in power armor. No love for the Orks this week, but maybe I'll throw down with them later on. My opponent was a Tau force and we played a short 770pt game. We rolled for the mission and it was a King of the Hill with Night Fight on the first turn. Although the player was new, he was a quick learner and it was nice for me since I had forgotten many rules myself.
I managed to nuke myself on my first turn by having my Librarian use Gate of Eternity and scatter a whole squad into difficult terrain, killing 5 of them, 2 of which were special weapons. In the subsequent turn, the rest of the squad was shot to death by Fire Warriors, leaving the Librarian alone. Fortunately enough, his Terminator Armor proved worthwhile and he survived without a scratch.
As I marched my other two tactical squads up to the objective, the Librarian assaulted the nearby Fire Warriors squad and tying them up for the remainder of the game. Slight opposition was met when the Tau Commander jumped in, by after a few whiffs with my Force Weapon, I finally killed him, passing my psychic test and killing him outright. The Librarian continued to tie up the fire warriors while the tactical squads controlled the objective. A bit shot up by the ended of the game, which was cut short at turn 5 due to the store closing, but they still got the job done.
Definitely looking forward to this weeks games. Eye'd up some of the other players while I waited around, gauging what I may need to take for the future.Overall I'm enjoying the points system. Start off with only Troops and HQ available and as you progress, Elites, Fast Attack and Heavy Support open up, as well as special characters. And a few more games and Vulkan He'Stan will be joining the force. Then I'll be bringing some hurt.
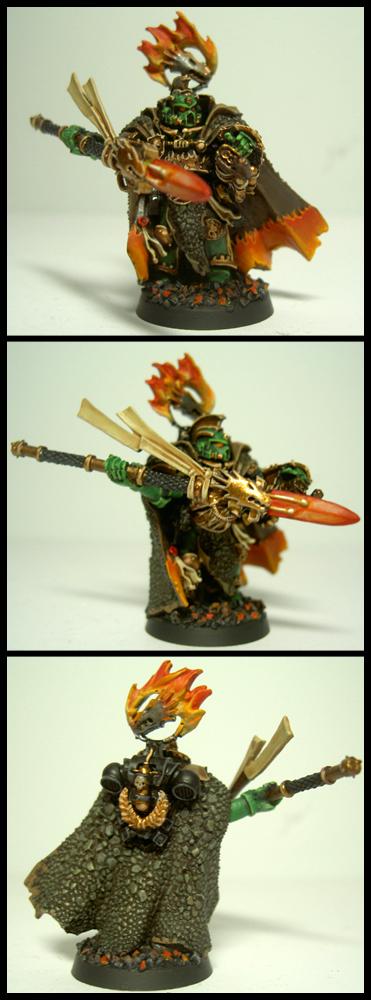
Vulkan He'stan
Tuesday, October 25, 2011
Salamanders Captain
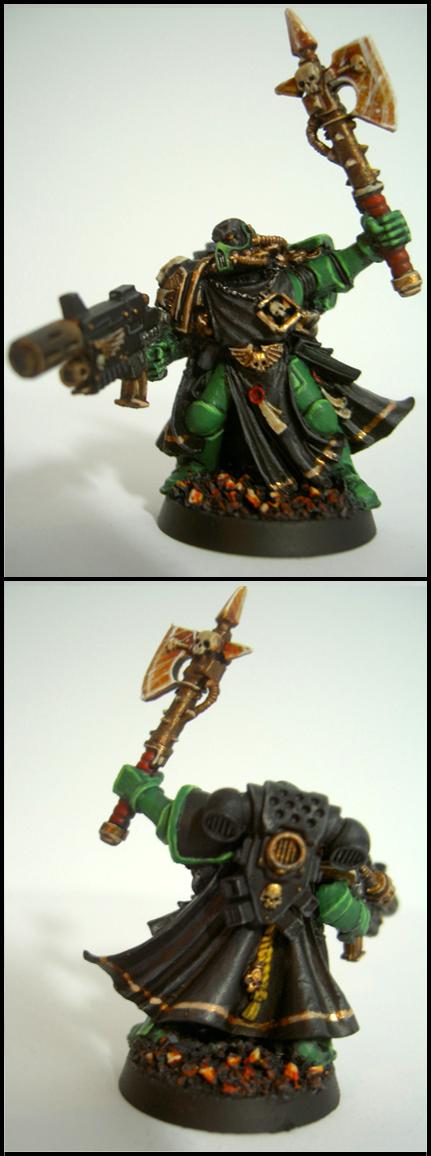
If I wanted to play demon looking things, I'd play Demons e__e.
Tuesday, October 11, 2011
Tutorial: Flesh Tearers Iconagraphy
A recent post on DakkaDakks spurred me to make a tutorial for making a buzzsaw for the Flesh Tearers Chapter Iconography.
Step 1: Get your base circular shape down. I recommend doing all the geometry work in pencil (mechanicals tend to work best). If you have any circular thigns to trace that suits the size of the buzzsaw (bottlecaps, vials,) or even better a Pencil Compass to get your exact size
Step Two: After you have your base color down, lightly divide the circle into sections with pencil, just like a pizza. For smaller saws I suggest less divisions since you may not be able to get in the detail with more teeth.
Step Three: Heres the detail work. Like in the figure below, draw the tooth edge. Starting at the tip of a division line, angle a line down (less than 45 degrees) and cut slightly into the next division. Then cut back up to the next division line point. You can either do this in pencil first or go right to the paint work, whatever you feel comfortable with.
Step Four: Repeat the process all the way around! Patience garners better results!
Step Five: Go in and fill in the surrounding color to the outside of the now formed buzzsaw.
Step Six: Get rid of the pencil lines (light erasing shall do) and toss in a blood drop. Now you have your Flesh Tearers symbol!

Enjoy!
Step 1: Get your base circular shape down. I recommend doing all the geometry work in pencil (mechanicals tend to work best). If you have any circular thigns to trace that suits the size of the buzzsaw (bottlecaps, vials,) or even better a Pencil Compass to get your exact size
Step Two: After you have your base color down, lightly divide the circle into sections with pencil, just like a pizza. For smaller saws I suggest less divisions since you may not be able to get in the detail with more teeth.
Step Three: Heres the detail work. Like in the figure below, draw the tooth edge. Starting at the tip of a division line, angle a line down (less than 45 degrees) and cut slightly into the next division. Then cut back up to the next division line point. You can either do this in pencil first or go right to the paint work, whatever you feel comfortable with.
Step Four: Repeat the process all the way around! Patience garners better results!
Step Five: Go in and fill in the surrounding color to the outside of the now formed buzzsaw.
Step Six: Get rid of the pencil lines (light erasing shall do) and toss in a blood drop. Now you have your Flesh Tearers symbol!

Enjoy!
Saturday, October 8, 2011


Subscribe to:
Posts (Atom)